The Half-Acre Food Plot: How to Build One by Hand With No Tractor
There's a myth in the deer-hunting world that food plots are a rich man's game, that you need a tractor, a disk, a planter, and a few thousand dollars before you can grow anything worth hunting over. It's simply not true. Some of the most productive hunting spots in the country are small plots, a half-acre or less, that were planted entirely with hand tools by someone willing to put in a weekend of sweat. These backwoods plots, often called "throw and grow" plots, can pull deer into bow range as reliably as anything a big operation puts in the ground.
If you have a chainsaw or a mower, a rake, a hand spreader, and a bag of seed, you can build a real food plot. Here's how to do it right, step by step, without a single piece of heavy equipment.
Why Small Plots Work So Well
Before the how, it's worth understanding the why. A small, hidden plot tucked into the timber does something a big agricultural field can't: it makes deer feel safe feeding in daylight. Big open fields often get hit hard after dark, when mature bucks feel comfortable exposing themselves. A quarter-acre kill plot surrounded by cover gives a deer just enough food to stop and browse while staying close to the security of the woods, and that's exactly the situation you want when you're sitting in a tree 20 yards away.
Small plots are also forgiving. You're not trying to feed the whole herd through winter. You're creating a destination, a reason for deer to walk past your stand. That lower bar is part of what makes hand-planting so achievable.
Step 1: Test Your Soil First
The single biggest mistake new food plotters make is skipping the soil test. It feels like an unnecessary step, but it's the difference between a lush plot and a patch of weeds. Pull soil samples early, ideally in late winter, around February or early March, so you have time to act on the results before planting season.
A soil test tells you two things that matter enormously: your pH and your nutrient levels. Most food plot seeds want a soil pH between 6.0 and 7.0, though many blends will tolerate conditions down to about 5.5. If your soil is too acidic, which is common in wooded areas, the plants can't absorb nutrients efficiently no matter how much fertilizer you throw down. The fix is lime, and the reason you test early is that lime takes months to change your soil's pH. Spreading it the same day you plant does almost nothing for that first season. Test early, lime early, and your plot will reward you.
Step 2: Pick the Right Seed for Hand-Planting
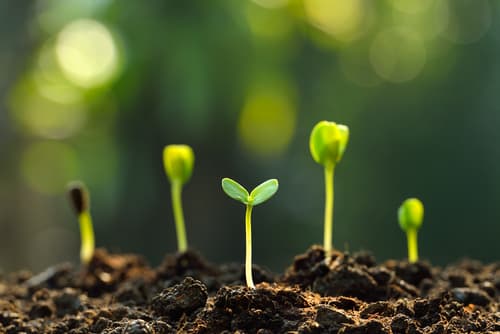
Not every seed is suited to throw-and-grow planting, so this choice matters. Look for blends specifically designed to germinate with minimal soil contact, products marketed as "throw and grow" or "no-till" mixes. These seeds are formulated to sprout when they simply touch exposed dirt, rather than needing to be buried at a precise depth by a planter.
For fall plots aimed at hunting season, popular hand-friendly options include brassicas like radishes and turnips, cereal grains like winter rye and oats, and clover blends. Many commercial mixes combine several of these so that something is always attractive to deer as the season progresses and temperatures drop. Buy a blend matched to your region and to the soil pH your test revealed, and check the recommended planting rate on the bag.
Step 3: Time It by the Weather, Not the Calendar
One of the most important lessons in food plotting is to plant by conditions, not by a date on the calendar. The key reference point for a fall plot is your area's average first frost. As a rule, you want to plant roughly 45 to 60 days before that first frost, which gives the plants enough time to establish before cold weather slows their growth.
Soil temperature matters too. Most fall blends germinate best when soil temperatures sit between 50 and 60 degrees. Just as important is moisture. Throw-and-grow plots rely on rain to push seeds into contact with the soil and kick off germination, so the ideal move is to plant right before a forecasted rain. Spreading seed onto dry dirt with no rain in sight is the fastest way to feed the local bird population instead of your deer.
Step 4: Prepare the Ground
This is the part that takes the sweat, but it's straightforward. Your goal is to expose bare soil so seeds can make contact with dirt rather than landing on a mat of dead vegetation.
Start by mowing or cutting the existing growth as low as you can. A string trimmer, push mower, or brush cutter all work for a small plot. Once you've knocked everything down, clear away the loose residue, the cut grass and debris, so it isn't blocking seeds from reaching the ground. Then take a hard rake or a drag and rough up the surface, scratching and exposing as much bare earth as possible. Finally, walk the plot and pull out any stones, sticks, and roots you can. The fewer obstructions on the surface, the more seeds will actually hit soil and germinate.
If you want to give yourself an even bigger advantage, many small-plot hunters spray the area with a herbicide a couple of weeks before planting to kill off competing weeds and grasses. It's an optional step, but killing the competition before you seed dramatically improves your results.
Step 5: Spread the Seed and Fertilizer
Now the satisfying part. Using a handheld broadcast spreader, distribute your seed evenly across the prepared ground. A common rate for throw-and-grow blends is around 5 pounds of seed per quarter-acre, but always defer to the rate printed on your specific seed bag. To get even coverage, walk the plot in two passes at right angles to each other, spreading half your seed north-to-south and the other half east-to-west. This crosshatch pattern prevents the streaky, patchy coverage you get from a single pass.
Right after seeding, apply a balanced fertilizer to give your young plants a strong start. A general-purpose blend like 13-13-13 works well for most plots, though your soil test may recommend something more specific. If you have access to a cultipacker or even just a lawn roller, lightly rolling the plot after seeding presses the seed into the soil and improves germination, but for a true no-equipment plot, a good rain will do that job for you.
Step 6: Let Nature and Patience Take Over
Once the seed and fertilizer are down, the work is mostly finished. If you timed your planting ahead of rain, you should see green shoots within a week or two. From there, it's a matter of patience, letting the plot mature and resisting the urge to walk through it constantly and leave scent behind. The same discipline that protects a trail-camera site protects a food plot: the less pressure you put on it before season, the more daylight movement you'll see when it counts.
The Bottom Line
A productive food plot is not about expensive equipment, it's about doing a few simple things in the right order. Test your soil early, choose a hand-friendly seed blend, time your planting to the weather, expose bare dirt, spread evenly, and plant ahead of the rain. Do that, and a half-acre of timber and a weekend of work can give you one of the best stand locations on your property, for a fraction of what most people think food plots cost. The tractor is optional. The effort is not.
More Articles

New Broadheads and Bow Tech for 2026: What's Actually Worth Your Money
Hot-Weather Hunting: How Sitka, KUIU, and First Lite Build for the Early Season
New Refuge Hunting Opportunities Near You: What the 2026 Expansion Actually Means

IP28 Explained: The Oregon Measure That Would Criminalize Hunting and Fishing
Ready to find your next deal?
Browse hundreds of used hunting gear listings from verified sellers.
Browse Listings